As a digital marketer, if you have ever ventured into using a paid Facebook advertising strategy, you know the Facebook platform can be quite complex. The mere fact that there are over 12 objectives that you can choose from for a Facebook Campaign, means there are is much to learn about all that Facebook has to offer. Each time a new client wants to create a Facebook campaign, it means having to understand their goal and which objective is best to achieve that. While picking an objective is specific to each client and goal at hand, there are a few steps in the set up that can be used for every client that wishes for you to take control and start running their Facebook Campaigns.
The following steps show how to gain access and link a Facebook account under a Business Manager Facebook account. For an agency, having all of your clients under a Business Manager account makes it much easier to access and review the performance of all your campaigns. In addition, this approach allows clients to keep their own login credentials private. Although there are multiple ways to gain access, here are instructions that we have felt make this step of the Facebook set up easier.
Gaining Client Facebook Account ID
First, you must gain the account ID information from your client. The following instructions can be sent to the client:
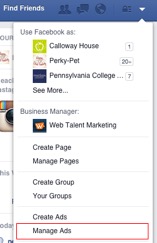
- Log in to Facebook, on your dropdown menu, go to “Manage Ads”.
- Click on the Account Settings tab. (You will have to re-enter your password at this point.)
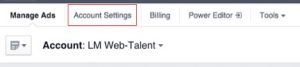
- On the Account Settings tab, locate your Account ID number in the Account Information section.
- Please let us know what your account ID number is.
Requesting Client Facebook Account Access
After the client has provided their account ID number, you must then login into your Business Manager account and complete the following steps:
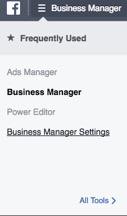
- Go to Business Manager Settings.
- In the Business Manager Settings, click on Ad Accounts on the left hand side.
- In the Ad Accounts page, click on the Add New Ad Account on the top right hand section.
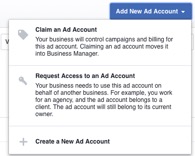
- Select Request Access to an Ad Account. A pop-up modal will appear that says Request Access to Ad Account. Type in the client’s Account ID in that section.
- Press OK and wait for the client to approve of the request.
Adding Account Roles
Once the client has approved your request, there is one last step that you must complete within your Business Manager Settings.
- In the Business Manager Settings, click on Ad Accounts on the left hand side.
- Look for the client’s account within the list of accounts and select it.
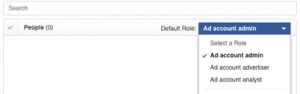
- Click Add People on the top right. When you do, a pop-up modal will appear that says Add People.
- In the Search Bar, write the name that is associated with your Business Account. On the right where it says, Default Role, switch the role to Ad Account Admin and press Save Changes.
That’s it! You should now have all the access you need to view, create, and analyze your client’s Facebook Campaigns in your Business Manager account.